Let’s Encrypt is a new Certificate Authority which has a couple of benefits almost unheard of before: It’s free, automated and open. This means you can actually use Let’s Encrypt to create real SSL certificates which will be accepted as valid by web browsers and others.
This post will describe how you can leverage a simple Azure Ubuntu VM to create a certificate for any domain you can control yourself (create a CNAME entry for). This how-to really starts with Adam and Eve, so if you already have an Ubuntu machine you can play with, and which is reachable from the public internet, you can skip the provisioning part on Azure.
Please note that Let’s Encrypt in no way depends on the VM being provisioned on Azure. It’s just what I currently have at hand (as I have an MSDN subscription).
Prerequisites
You will need the following things, which this how-to does not provide you with:
- A valid Azure Account and some credit to play with (depending on how fast you are, you will need something between 10 Cents and a Euro/Dollar).
- Know-how on how to create a CNAME (DNS entry) for your machine (I usually delegate this to our friendly IT, they know that by heart).
- You need to know which DNS name you want for your certificate. I will assume
myserver.contoso.comthroughout this blog post.
Provision an Ubuntu VM on Azure
To start things, open up the Azure Portal using your favorite web browser, and log in so that you have access to the Azure portal. Then click Virtual machines (Classic), then Add +.
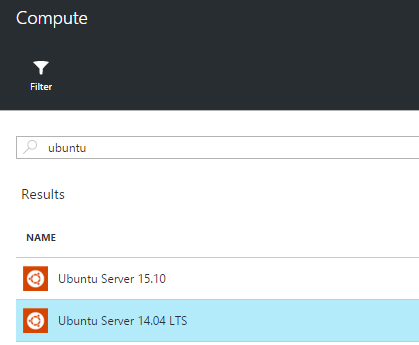
Then, search for ubuntu and select Ubuntu Server 14.04 LTS (I think you can choose a regular Ubuntu, too, but this one definitely works).
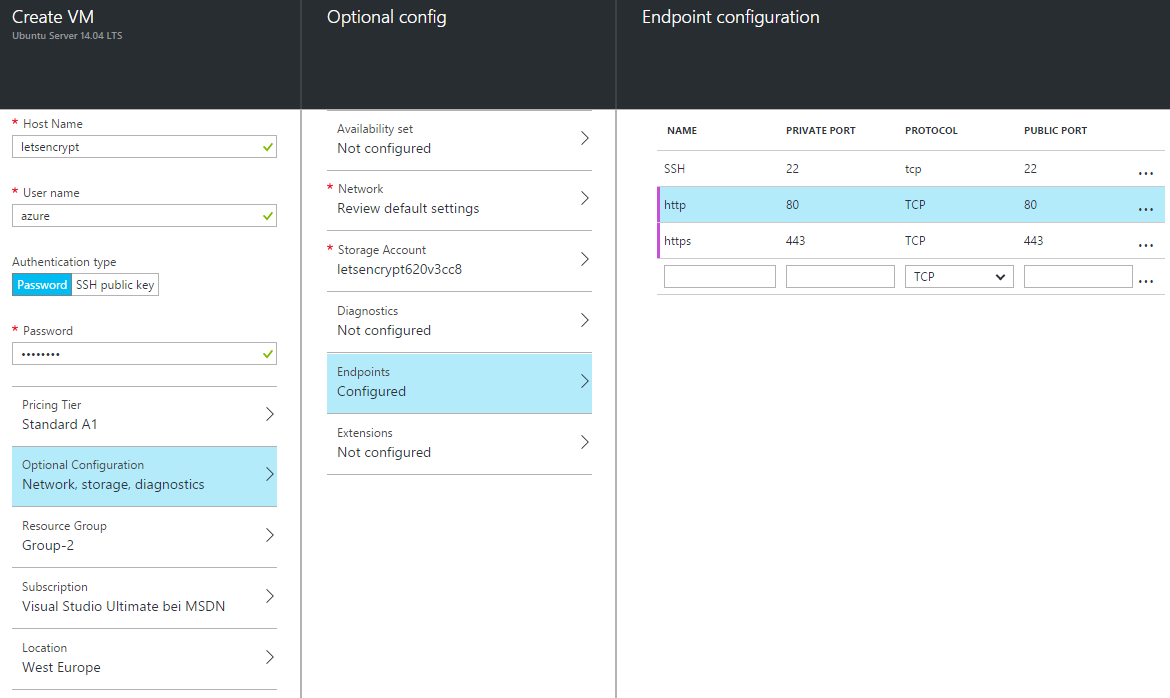
Specify the correct settings for the VM. I chose the following specs for the VM:
- Hostname
letsencrypt(Azure will pick a name for you starting withletsencrypt) - User name
azure(or whatever you want) - Choose Password and enter a valid password
- Standard A1 (1,75 GB of RAM, 1 Core, completely sufficient)
- Add two endpoints: http (tunnel port 80) and https (tunnel port 443). See image below.
- Leave the rest of the setting to the defaults
When you’re done and all your settings have been confirmed (OK), click the Create button to provision your VM.
Note: You will be charged for running the VM on Azure. This is the only cost though you will generate when creating the certificate.
This will take some time (around 5 minutes), but after that, you will find the information on your machine in the following way:
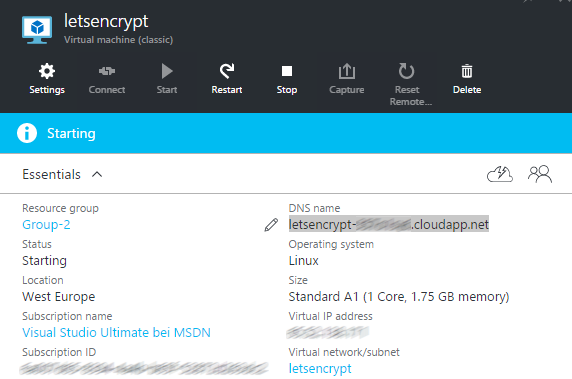
The automatically created DNS entry for your machine is displayed there, and this is the name you can use to connect to the machine using your favorite SSH tool (ssh if you’re on Linux or Mac OS X, e.g PuTTY if you’re on Windows).
Set the CNAME to your VM
Now that you have a running Ubuntu machine we can play with, make sure the desired host name resolves to the Ubuntu VM DNS name from the above picture. Pinging myserver.contoso.com must resolve to your Ubuntu machine.
If you don’t know how to do this, contact your IT department or somebody else who knows how to do it. This is highly depending on your DNS provider, so this is left out here.
Setting up your Ubuntu machine for Let’s Encrypt
Now, using an SSH client, log into your machine (using the user name and password you provided when provisioning it). I will assume that your user is allowed to sudo, which is the case if you provisioned the Ubuntu machine according to the above.
First, install a git client:
azure@letsencrypt:~$ sudo apt-get install git
Then, clone the letsencrypt GitHub repository into the azure user’s home directory:
azure@letsencrypt:~$ git clone https://github.com/letsencrypt/letsencrypt
Get into that directory, and call the letsencrypt-auto script using the certonly parameter. This means Let’s Encrypt will just create a certificate, but not install it onto some machine. Out of the box, Let’s Encrypt is able to automatically create and install a certificate onto a web server (currently, Apache is supported, nginx support is on its way), but that requires the web server to run on the very same machine. But as I said, we’ll just create a certificate here:
azure@letsencrypt:~$ cd letsencrypt/
azure@letsencrypt:~$ ./letsencrypt-auto certonly
This will install quite a few additional packages onto your machine, which is also in part why I prefer to do this on a separate machine. The installation process and creation of the Let’s Encrypt environment takes a couple of minutes. Don’t get nervous, it will work.
Using only the default values, you will end up with a 2048 bit certificate valid for 3 months. If you issue ./letsencrypt-auto --help all you will see an extensive documentation of the various command line paramaters. The most useful one would presumably be --rsa-key-size which you can use to e.g. create a 4096 bit certificate.
Using Let’s Encrypt
In the first step, Let’s Encrypt will ask for an administration email address; this is the email address which will be used if some problems occur (which normally doesn’t happen). You will only have to provide this address once, subsequent calls of letsencrypt-auto will not ask for it (it’s stored in /etc/letsencrypt).
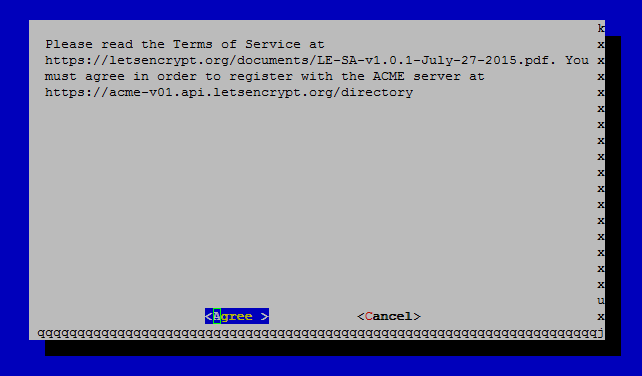
After that, you will have to accept the license terms:
In the next step, enter the domain name(s) you want to create the certificate for:
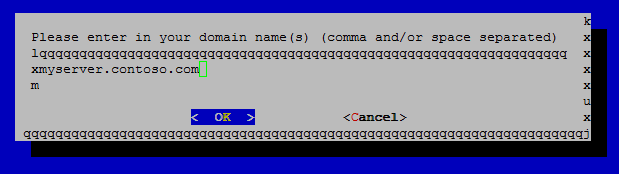
Usually, you will create one certificate per domain you will use. Exceptions will be for example when creating a certificate which is both valid for www.contoso.com and contoso.com, if your web server answers to both. In this case, we will just provide myserver.contoso.com (this might be a web service or similar).
If everything works out, Let’s Encrypt will have created the certificate files for you in the /etc/letsencrypt/live folder. If you run into trouble, see below section of common problems.
Getting the certificates to a different machine
In order to get the certificates off the Ubuntu VM, issue the following commands (first, we’ll go root):
azure@letsencrypt:~$ sudo bash
root@letsencrypt:~# cd /etc/letsencrypt/live
root@letsencrypt:/etc/letsencrypt/live# ll
total 20
drwx------ 5 root root 4096 Dec 16 13:50 ./
drwxr-xr-x 8 root root 4096 Dec 15 14:38 ../
drwxr-xr-x 2 root root 4096 Dec 16 13:50 myserver.contoso.com/
root@letsencrypt:/etc/letsencrypt/live# ll myserver.contoso.com
total 8
drwxr-xr-x 2 root root 4096 Dec 16 13:50 ./
drwx------ 5 root root 4096 Dec 16 13:50 ../
lrwxrwxrwx 1 root root   43 Dec 16 13:50 cert.pem -> ../../archive/myserver.contoso.com/cert1.pem
lrwxrwxrwx 1 root root   44 Dec 16 13:50 chain.pem -> ../../archive/myserver.contoso.com/chain1.pem
lrwxrwxrwx 1 root root   48 Dec 16 13:50 fullchain.pem -> ../../archive/myserver.contoso.com/fullchain1.pem
lrwxrwxrwx 1 root root   46 Dec 16 13:50 privkey.pem -> ../../archive/myserver.contoso.com/privkey1.pem
You should see the four files belonging to the certificate inside the /etc/letsencrypt/live folder. We will tar these up and make sure you can access them (securely) from the outside:
root@letsencrypt:/etc/letsencrypt/live# tar cfvzh ~azure/keys_contoso_com.tgz myserver.contoso.com/*
myserver.contoso.com/cert.pem
myserver.contoso.com/chain.pem
myserver.contoso.com/fullchain.pem
myserver.contoso.com/privkey.pem
root@letsencrypt:/etc/letsencrypt/live# chown azure:azure ~azure/keys_contoso_com.tgz
root@letsencrypt:/etc/letsencrypt/live# exit
azure@letsencrypt:~$
Now you’ll have a file called keys_contoso_com.tgz in the home directory of the azure user. Pick your favorite tool to get the file off the machine, e.g. WinSCP on Windows or scp on Linux or Mac OS X machines.
Backing up /etc/letsencrypt
If you plan to re-use the settings of Let’s Encrypt, please also back up the entire /etc/letsencrypt folder and store that in a safe place.
Converting to other formats
In some cases, you can just use the PEM certificate files (e.g. for nginx or Apache). In other cases, you will need to convert these certificate files into a different format, like PFX. For more information on that, please see the following website: https://www.sslshopper.com/ssl-converter.html.
Using the certificates
Now you’re all set and done. You can now use the certificates on the actual machine you want to use them on. Before you do that, make sure the CNAME is set to the correct machine (your web server, web service,…). Depending on the TTL of the DNS setting, this may take some time, but your friendly DNS responsible will be able to tell you this.
Side note: I successfully used certificates created in this way with the Azure API Management service to get nicer looking names for my API end points (e.g. api.contoso.com instead of api-983bbc2.azure-api.net or similar) and developer portal (e.g. https://portal.contoso.com).
VM disposal
After you have finished all steps, make sure you power off your virtual machine (using the Azure Portal). In case you want to re-use it for other certificates, just power it off, but keep the storage for it, so that you can power it back on again. This will also generate some running cost, but it’s almost neglectable (a couple of cents per month).
If you want to get rid of all running costs for the VM, delete the VM altogether, including the storage (Azure Portal will ask you whether you want to do this automatically).
Common Problems
- Let’s Encrypt cannot connect: Let’s Encrypt starts its own little web server which is used to verify the CNAME actually belongs to the machine. If port 80 and/or 443 are already occupied, this will obviously not work. Likewise, if ports 80 and 443 are not available from the public internet (you forgot to specify the endpoints?), Let’s Encrypt will also fail.
- Domain Name blacklisted: If you try to create a certificate for a domain name which has a top level domain belonging to one of the larger providers, chances are that the request will be rejected (
Name is blacklisted). This also applies for any machine names directly on Azure (*.cloudapp.net). You will need your own domain for this to work.
Disclaimer
Currently, at the time of writing, Let’s Encrypt is in public Beta. Which means I would not recommend using these certificates for production. When testing SSL related things, it may very well be useful anyhow.
Additionally, by default the certificates are only valid for 3 months. If you need to renew the certificate, you should probably think of either getting a paid certificate valid for a longer period of time, and/or actually installing Let’s Encrypt on your actual web server. On that machine, you could create a cron job to renew the certificate every two months.